

DIY balcony privacy screens are custom-built barriers that block the view into your outdoor space from neighbors and people walking by. They are a creative and practical upgrade that turns a simple balcony into a quiet hideaway, so you can enjoy your morning coffee or evening reading without feeling watched.
By doing it yourself, you can choose the height, material, and style to match your home’s look while keeping to your budget.
These screens do more than give you privacy. They can hide ugly views like utility poles or alleys and add shade during hot summer days. If you want a more professional starting point, a balcony privacy screen from Shade4You gives you a solid base you can customize further or simply use as inspiration.
Whether you rent and need something temporary or own your home and want something long-term, a privacy screen is an ideal weekend project to make your outdoor space feel calm and private again.
What Are DIY Balcony Privacy Screens?
How Do Privacy Screens Improve Outdoor Living?
Privacy screens do more than block the view from other people’s windows; they can change how your balcony feels. By adding a clear boundary, they turn the space into more of an outdoor “room” instead of just a ledge. This enclosed feeling makes the area feel cozy and intentional, which makes you more likely to use it.
These screens can also act as a windbreak, protecting plants and furniture from strong gusts that might knock things over.
From a mental health point of view, having a private outdoor spot helps you relax. It is hard to unwind if you feel like someone might be watching you. A well-placed screen removes a lot of visual distractions from busy streets or neighboring buildings, so you can pay attention to fresh air and sunlight.
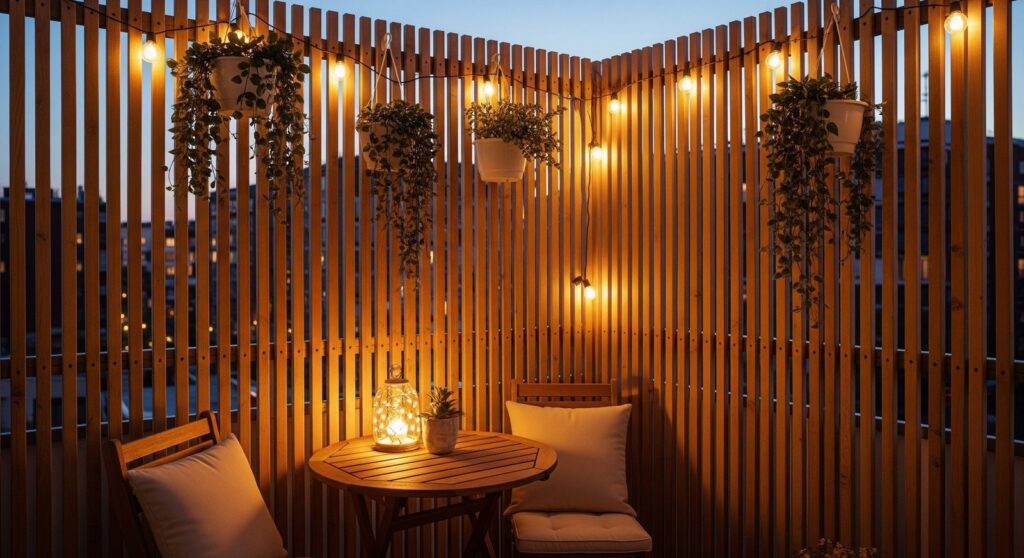
You can also hang decor like solar lights or a vertical garden on the screen, turning it from a plain barrier into a standout feature on your balcony.
Which Spaces Benefit Most from Balcony Privacy Screens?
Any outdoor area can feel better with more privacy, but small city balconies gain the most. In dense neighborhoods, balconies often face each other directly, which makes private conversations and quiet time difficult. A DIY screen helps fix this “fishbowl” feeling fast. Even a single 4-foot panel can block the main line of sight from a nearby window, which can greatly increase your comfort.
Ground-floor patios and low decks also benefit. In these spots, screens add privacy and a feeling of extra security by making the area seem less open to the street. Furthermore, brands like Shade4You suggest that well-placed screening elements can effectively define a personal sanctuary even in the busiest urban environments.
Balconies that look out on trash areas or utility equipment can also use screens to hide these views and replace them with a neat wood wall or green trellis.
How to Plan Your Balcony Privacy Project
Measuring and Assessing Your Balcony Space
Good measurements are the base of any DIY project. Start by measuring the total width and height of the area you want to cover. Remember the difference between “nominal” (what the board is called) and “actual” (its real size). For example, a 2×2 board actually measures 1.5 inches by 1.5 inches. If you ignore this, you can end up with gaps or a screen that does not fit right. Use a steel tape measure and write the measurements on a simple sketch of your balcony.
Besides size, check how strong your current railing is. If you plan to attach a screen to it, make sure it can hold the extra weight and handle wind. Use the actual size of each board when you figure out how many pieces you need.
For instance, if you want a 4-foot wide screen made from 1×2 boards (1.5 inches wide) with 1.5-inch gaps, you will need to calculate how many boards it takes to cover that space while keeping the gaps even.
Choosing the Right Privacy Screen Style for Your Needs
The style you choose depends mainly on how much privacy you want. A solid panel blocks all views but also blocks some light and airflow. A slatted screen with 1-2 inch gaps has a modern rustic look, lets breezes pass through, and still blurs the view. If you prefer a more natural look, a trellis or lattice style works well for climbing plants that can grow into a thick, green wall.
Think about board direction too. Horizontal slats can make a small balcony feel wider and more modern, while vertical slats can make it feel taller. If you want something with a designer feel but on a smaller budget, you can build a herringbone pattern by angling the slats inside a strong frame. Picture how the screen will look from inside and outside your home so it fits your overall design.
Benefits of Temporary vs. Permanent Screens
Temporary screens are ideal for renters. They are usually freestanding or fixed with non-damaging fasteners like cable ties or tension rods. Their big advantage is that you can take them with you. When you move, you just cut the ties or fold the panels and go.
Temporary options like outdoor curtains or folding bamboo screens also let you change your level of privacy during the day by opening or closing them as needed.
Permanent screens are more stable and long-lasting. They are often bolted to the balcony floor or built into the existing railing. They take more work and a bigger budget, but they can increase your home’s value. Permanent screens are better for windy locations and can carry heavier items like large hanging planters or built-in benches. Your choice depends on whether you rent or own and how long you expect to use the space.
Checking HOA and Apartment Regulations Before Installing
Before you start cutting wood, check your local building codes and any Homeowners Association (HOA) rules. Many apartment buildings have clear rules about balcony height limits and approved materials. Some do not allow changes that can be seen from the street, while others may require certain colors. It is better to check ahead, since an unapproved screen can lead to fines or demands to remove it.
Sometimes you must send a simple drawing or photo of your plan for approval. If your HOA is strict, choose “renter-friendly” designs that do not permanently change the structure. Screens that sit just under railing height or screens made from natural materials like bamboo often get easier approval than tall, bright wooden walls. Always make sure your design does not block emergency exits or drainage.
What Materials Work Best for DIY Balcony Privacy Screens?
Wood Options: Slats, Panels, and Reclaimed Materials
Wood is the most common material for DIY screens because it is flexible and easy to work with. Cedar and redwood are high-quality choices because they naturally resist rot and insects, which makes them great outdoors. If you want to save money, pressure-treated pine is a strong option, but it needs regular stain or paint to keep it looking good. When buying wood, choose boards that are dry so they do not warp later.
If you like a rustic look, reclaimed wood or old pallets can become great screens. Pallets already have a frame shape; with sanding and weatherproofing, they can turn into a useful slat wall. Check the stamps on pallets to make sure they were heat-treated and not treated with harmful chemicals.
Metal Frames and Grilles
Metal gives a sleek, modern style that works well with many apartments. Aluminum is a good pick because it is light and does not rust. Galvanized steel is stronger and better for bigger structures. You can use metal pipes as a frame for curtains or attach metal grilles to a wood frame for an art deco look.
Wrought iron pieces are another option, though they are heavier and harder to size perfectly. Many DIY builders mix materials: for example, a metal frame holding wooden slats or fabric panels. This mix gives you the strength of metal with the warm look and easy custom options of wood.

Outdoor Fabrics and Weatherproof Textiles
Fabric is great for a soft, resort-style balcony. Look for solution-dyed acrylic or outdoor polyester fabrics (like Sunbrella) that are made to resist fading, water, and mildew. You can hang outdoor curtains on a tension rod or metal pipe to get privacy that you can open and close easily.
For a more modern look, use mesh or shade cloth. These give partial privacy but still let air flow, which helps keep the area cool. You can also stretch outdoor fabric over old windows or shutters to create semi-see-through panels that let light in but blur the view outside.
Lattice, Trellis, and Plant-Based Solutions
Lattice panels are a classic, low-cost choice that are easy to install. Made from wood, vinyl, or composite, lattice has an open pattern that gives privacy without feeling closed in. It works especially well for climbing plants like ivy, jasmine, or clematis, which can grow into a living screen over time.
Trellises do something similar but tend to be more decorative. You can buy freestanding trellises that sit in large planters, which is great for renters. If you want instant greenery without care, faux boxwood panels are popular. Attach them to your railing or a frame and you get a year-round green backdrop with no watering.
Upcycled and Eco-Friendly Material Ideas
Upcycling lets you build a unique privacy screen while reusing materials. Old shutters, doors, and window frames can be hinged together to form a folding screen with a cozy “cottage” style. A new coat of outdoor paint can make mismatched items look like one piece. Shutters work especially well because their slats let you control light and airflow.
Bamboo is another strong eco option. It grows fast, is sustainable, and stands up well to weather. You can wire bamboo poles together to form a mat or use them as posts in a more built frame. For a relaxed, boho feel, use bamboo fence rolls and tie them to your balcony railing with wire or cable ties.
What Types of DIY Balcony Privacy Screens Are Most Popular?
Living Walls and Vertical Gardens
Living walls give you privacy and room to garden at the same time. Build a vertical frame from 2×4 posts and attach rows of planters or hanging pockets. This works for herbs, succulents, and trailing vines like pothos. The plants block the view, cut down city noise, and cool the area slightly as they release moisture.
If you are short on floor space, mount planters on the wall or use stackable shelves to cover one side of the balcony. With fast-growing plants, you can get a full green barrier in one season. Remember that living walls are heavy. The soil and water add a lot of weight, so check that your balcony can handle it.

Freestanding Privacy Panels
Freestanding panels are popular because you do not need to attach them to the building. They usually have a heavy planter box at the bottom to hold them steady, with a tall wood or lattice screen above.
Fill the planter with soil and stones so it does not tip in the wind. This style gives you a “secret garden” feel and can be moved around if you change your layout.
Many people use composite panels for these projects. Composite (a mix of wood fibers and plastic) does not rot, warp, or need stain. Many panels have laser-cut patterns that add a modern art touch to your balcony. Since they stand on their own, they are a good solution for renters who want a good-looking screen without damaging the property.
Outdoor Curtains and Fabric Panels
If you like a soft, romantic vibe, outdoor curtains are a great choice. They give “privacy on demand”: close them for a private dinner, open them to enjoy the view. You can mount a weather-resistant rod to the balcony ceiling and hang the curtains. For a more fixed look, stretch outdoor fabric across a simple wood frame and staple it in place to make fabric panels.
To keep curtains from flapping wildly, sew small weights into the bottom hem or add hooks and ties at railing height. Neutral colors like white, beige, or gray give a relaxed, beach-like feel, while bright patterns can make the balcony feel like an outdoor extension of your living room. Use a UV-protectant spray on the fabric to help prevent fading.
Lattice Screens and Trellis Installations
Lattice is a longtime favorite for balcony privacy. You can buy 4×8 sheets, cut them to size, and frame them with 2×2 strips for a cleaner, more finished look. This light frame can be hung from the ceiling or fixed to the railing with cable ties.
A trellis is useful if you want partial privacy. By placing a tall trellis on just one side, you can block a specific neighbor’s view while leaving the rest open and bright. When you add climbing plants like roses or jasmine, you get extra beauty and scent along with privacy.
Repurposed Doors, Shutters, and Fencing Sections
If you like shabby-chic or industrial style, repurposing old building parts is a smart DIY approach. A row of old shutters connected with hinges makes an adjustable divider you can angle for shade or privacy. You can hang small pots from the slats to add plants. Old fence panels can be cut down and painted a bright color to act as a focal point.
Old doors also work well. A single vintage door, sanded and stained, can become a strong privacy “wall” at the end of a balcony. Because doors and heavy fencing weigh more, they often stand more firmly. Just use outdoor-grade hinges and hardware so they hold up to sun, rain, and wind over time.
How Much Does a DIY Balcony Privacy Screen Cost?
Budget-Friendly Options and Money-Saving Tips
Building your own screen is often about half the cost of buying a ready-made one. To keep costs down, use common pine instead of cedar and protect it with a good exterior stain. You can also save by spacing your slats farther apart, which uses less wood, or by building the screen only as tall as you actually need rather than from floor to ceiling.
Another money saver is the “cull lumber” section at home stores, where boards with small flaws are sold at a big discount. Using salvaged items like pallets or shutters is often the cheapest route. These are sometimes free on local marketplace sites or from renovation jobs. With some sandpaper and a small can of paint or stain, free materials can look high-end.
Comparing DIY vs. Prefab Privacy Screens
Pre-made privacy screens are convenient but often pricey, starting around $150 and going up to $500 or more depending on size and material. They come ready to use but are usually built to standard sizes, which may not match your balcony perfectly. Many prefab models are also not as strong as a screen you build yourself from solid lumber.
By building your own, you can choose exact stain colors, slat spacing, and extras like built-in planters or lighting that prefab styles may not offer. DIY projects take time (usually a weekend) and require some basic tools, but the freedom to make the screen fit your space and the satisfaction of building it yourself can outweigh the ease of buying a ready-made version.
How to Build and Install a DIY Balcony Privacy Screen
Essential Tools and Supplies
Gather your tools before you start to keep the build simple and smooth. Hand tools can work, but power tools make things faster. You will typically need:
- Measuring Tape: For accurate measurements.
- Miter Saw or Circular Saw: To cut boards to length.
- Drill and Driver: For pre-drilling and driving screws.
- Sander or Sanding Block: To smooth edges (80-220 grit).
- Level: To keep your frame straight and upright.
- Safety Gear: Goggles, dust mask (especially for pressure-treated wood), and gloves.
- Fasteners: Exterior deck screws or a nail gun with galvanized nails.
- Finish: Exterior paint or stain plus a clear outdoor topcoat.
Step-by-Step Balcony Privacy Screen Instructions
A basic slat-style screen makes a good mid-level DIY project. Follow these steps:
- Cut the Wood: Cut your vertical posts and horizontal slats to the sizes in your plan. For an 8-foot screen, you may leave vertical boards at full length to avoid extra cuts.
- Sanding: Sand all boards before building. Start with coarse grit and finish with fine grit for a smooth, splinter-free surface.
- Painting or Staining: It is easier to paint or stain boards before assembly. Apply your chosen finish and let it dry fully. Don’t forget to coat the cut ends.
- Assemble the Frame: Lay the vertical posts on a flat surface and use a carpenter’s square to keep corners at 90 degrees.
- Attach the Slats: Begin at the top. Use a scrap piece as a spacer so gaps between slats stay even. Pre-drill holes to avoid splitting the wood, then drive in your screws or nails.
- Add the Top Coat: After assembly, add a final clear weatherproof coat to protect from sun and moisture.

Safety Precautions and Balcony Load Limits
Safety should always come first. Do not lean over the railing while working. If you can, build the screen flat on the ground and lift it into place with a helper. Wear a mask when cutting pressure-treated wood, as the dust contains chemicals. Keep your tools in order and clear your work area of cords and scraps that could cause trips.
Be aware of how much weight you are putting on the balcony. A simple wood screen is usually fine, but heavy planters filled with soil, stones, or a big vertical garden can add a lot of load. Check your building information for maximum load ratings. If you are unsure, choose lighter materials like aluminum, composite, or fabric instead of very heavy wood and stone.
Tips for Weatherproofing and Durability
Good weatherproofing helps your screen last longer. Use pressure-treated lumber for any parts touching the floor or exposed to standing water. Apply a quality outdoor paint or stain with UV protection, then finish with a clear outdoor topcoat like spar urethane for extra defense against rain and snow.
Pay special attention to the cut ends of boards, since they take in water more easily. Fill screw holes and cracks with wood filler before painting to keep water from sitting in them. If your screen is freestanding, you can add small feet or pads to lift it slightly off the ground so water drains away and air can circulate underneath.
Creative Ways to Personalize and Upgrade Your Privacy Screens
Adding Solar Lights or String Lighting
Lighting can turn your privacy screen into a cozy backdrop at night. Solar lights are perfect for balconies because they do not need an outlet. You can screw small solar fixtures onto the vertical posts. Mark the drill spots, pre-drill, and mount the lights. They charge during the day and turn on automatically after dark.
String lights can be woven through slats or draped across the top to give off a warm, inviting glow. For a cleaner, modern look, you can attach LED strip lights behind the frame for a soft backlight effect. Good lighting makes the space more useful at night while adding style.
Integrating Planters and Climbing Vines
Adding plants is easy. Hang pots from over-the-rail hooks or fix small planter boxes directly onto the screen. Trailing plants like ivy or sweet potato vine will spill over the edges and soften the look of the wood or metal.
If you do not like plant care, use realistic artificial vines instead. They create an instant full, green look and need no watering. Secure them with a staple gun or zip ties to keep them from blowing loose. You can also mix live and faux plants so the screen looks full right away while real plants slowly grow in.
Painting, Staining, or Decorating Panels
Color has a big effect on how your balcony feels. Dark charcoal or black stain looks modern and makes greenery stand out. Light natural stain works well for rustic or Scandinavian styles. Bright colors like teal, mustard, or terracotta can make your screen look like outdoor wall art.
You can also use stencils to add patterns or designs. Some people paint full murals on larger panels. On solid or lattice sections, you can hang decor like metal art, outdoor clocks, or weather-proof mirrors to reflect light and visually expand the space.
Mixing Materials for a Custom Look
You do not need to stick to one material. Many eye-catching DIY screens combine wood, metal, glass, or fabric. For example, build a cedar frame and fill the center with a decorative metal panel or outdoor fabric insert. This lets you adjust the weight, look, and privacy level.
Another idea is combining wood and glass. Use tempered glass inside a wood frame to blur the view while keeping things bright. Or run copper pipes as horizontal slats in a wood frame for an industrial feel. Playing with different textures lets you build a screen that truly fits your style.
Frequently Asked Questions About DIY Balcony Privacy Screens
Are DIY Privacy Screens Safe for Renters?
Yes, as long as you avoid permanent changes. Freestanding screens with heavy bases are a smart choice because you do not need to drill into walls or floors. You can also attach light screens directly to the railing with strong cable ties.
When you move out, you just cut the ties or carry out the freestanding unit, leaving no marks. Always read your lease first, but most landlords accept temporary, non-damaging projects. Outdoor curtains, bamboo mats, and similar options are usually safe choices if you want to protect your deposit.
How Can Privacy Screens Withstand Wind and Weather?
Wind is the main challenge, especially on high floors. To help your screen stay in place, use weighted bases or secure it to the railing at several points. For slatted designs, leave small gaps so air can pass through, which reduces wind pressure on the structure.
Use exterior-rated screws, nails, and finishes to handle rain and sun. Stainless steel or galvanized fasteners resist rust. Check your screen now and then for loose parts or wear. If your area has harsh winters, consider building your screen so it can be taken apart or moved to storage in the off-season to keep it in good shape longer.
Can a Privacy Screen Double as a Vertical Garden?
Yes. Many people use their screen as the base for a vertical garden. Attach pots, planters, or a trellis to turn it into a green wall. This is a good way to grow herbs, veggies, or flowers in a small space. Just make sure your frame is solid enough to carry the extra weight of wet soil and plants.
Choose plants based on how much sun the screen gets. For darker areas, go for shade-loving plants like ferns or hostas. For sunny balconies, herbs like basil, thyme, or rosemary and flowering vines like mandevilla do very well. A living wall gives privacy, fresh air, and a more natural feel right outside your door.
Are There Modular or Folding Privacy Screens?
Yes, both modular and folding screens are great flexible options. A folding screen works like an indoor room divider. Hinge three or four panels together so you can bend them into different angles or fold them flat when you want an open view. This is handy if you only need privacy or shade at certain times.
Modular screens use separate panels you can connect as needed. They are helpful for large or oddly shaped balconies. You can start with a couple of panels and add more over time. Many modular kits are easy to put together, which makes them appealing for DIY fans who want custom sizes without complex carpentry.
After finishing your project, regular care will help it last. At the end of the season, wash the screen with mild soap and water to remove dirt and pollen. Store fabric parts and small modular panels in a dry place or storage box during winter. Keeping your DIY privacy screen clean and dry when not in use will help it stay strong and good-looking for years.